This article shows you how to connect your Solid Commerce account to an Endicia DAZzle account to print USPS shipping labels.
What we'll cover:
- Before You Connect
- DAZzle Installation
- Creating a Shipping Profile in Solid Commerce
- USPS Label Layouts in DAZzle
- Customizing DAZzle Labels
- Printer Setup
- Saving DAZzle Labels
- Related Articles
Before You Connect
Before you connect, it's important to understand that Endicia offers two different types of accounts:
- DAZzle
- Endicia Label Server (ELS)
Both types of Endicia accounts work with Solid Commerce.
DAZzle is great for customizing your shipping labels. If you're already using DAZzle, you can continue to do so.
However, if you don't currently have an Endicia account, we recommend opening an Endicia Label Server account. Using the Endicia Label Server involves less setup work, prints labels faster, and allows any computer to connect without installing software. For more info, see Connecting to an Endicia Label Server to Print USPS Labels and Receive Shipping Dsicounts.
To work with SolidShip, you need the Enidicia Premium plan or better. For more information about Endicia and DAZzle, go to endicia.com.
DAZzle Installation
DAZzle is a software application. You need to install it on your computer. To do so:
- Log in to your Endicia account on endicia.com.
- My Account menu -> Software sub menu -> Download Software (install required)
- The full version of DAZzle is available in the “Endicia Professional Suite” download.
- Run the installation.
- Connect to your Endicia account. Launch DAZzle -> Go to the Postage menu -> Account Setup…
Creating a Shipping Profile in Solid Commerce
- Go to the Solid Commerce Admin menu -> Manage Shipping Carriers (Legacy).
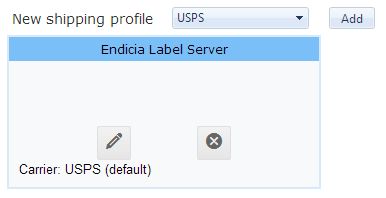
- In the New shipping profile dropdown, select USPS and click the Add button. This opens the Add Profile pop-up.
- Enter a Profile Name.
- Check Is Default if this will be your primary Endicia profile.
- In the USPS Provider dropdown, choose Endicia Dazzle.
- Enter your Account ID and Pass Phrase. Click the Save button.
-
Once you've done this, an Add to Balance field and Purchase button will appear. This allows you to buy postage directly through your Solid Commerce account without needing to login to Endicia.
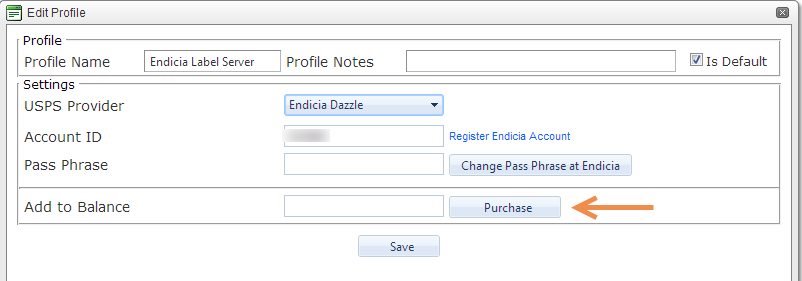
- Close the pop-up when you're done.
Once you have saved profiles, hovering over any of them with your mouse will give you the ability to edit or delete them.
USPS Label Layouts in DAZzle
NOTE: Endicia has the most up to date and definitive information regarding which labels to use, so please check with them.
Here is a short list of label layouts that our customers commonly use. Different shipping methods require different layouts. The label layouts also depend on the size of the label, which is controlled by the type of printer you are using.
- 4x6 USPS First Class -> Zebra Label.lyt
- 4x6 USPS Priority -> Zebra Label.lyt (Same as First Class)
- 4x6 USPS International First Class -> Zebra Small First Class Mail International Shipping Label.lyt
- 4x6 USPS International Priority -> Zebra Small Priority Mail International Shipping Label.lyt
- 8.5x11 USPS International First Class -> International Label - Large.lyt
- 8.5x11 USPS International Priority -> Large Priority Mail International Shipping Label.lyt
- 4x6 APO -> APO FPO Small 6x4.lyt
Customizing DAZzle Labels
NOTE: You will want to consult with Endicia for the best information about editing labels, but these are some of the basics:
Opening a Label Layout in DAZzle:
- Select the Design tab.
- Go to the File menu -> Open Layout…
- Choose the layout you want to edit. Click the “Open” button.
Common areas that people setup on the label layouts include:
Return Address:
- You can edit the return address in DAZzle by double clicking on it.
- If you want to use multiple return addresses, or want more control over the return address, you can specify an address in your Shipping Rules.
- In Solid Commerce -> Admin menu -> Manage Shipping Rules.
- Select an address from the “Ship From Address” drop down menu on the right-hand side of the rule, or click the “Manage” link to add more addresses.
- You can manage the Default Ship From Address by navigating to Admin menu -> Manage Seller Account -> Default Ship From Address tab.
Customs Form:
International labels need a Customs form.
- Open one of the international label layouts from the Design tab of DAZzle.
- Click the “Print” button.
- In the pop up window -> Select the Customs Information tab.
- Select a Content Type and Check the “I certify that the particulars given in this customs declaration are correct” box.
- Enter a person’s name in the signature field.
- Click the “Save As…” button.
- We recommend saving the Customs Form with your label layouts so it is easy to find.
- The default location for the label layouts can vary slightly depending on how your computer is setup, but it should be something like: C: drive -> Users -> Public -> Public Documents -> Endicia -> Dazzle.
Stealth Postage:
The Stealth Postage option removes the postage amount from your shipping label so that your buyer does not know how much you paid.
- Open any of your label layouts from the Design tab of DAZzle.
- Click on the “Postage Options” button.
- In the pop up window -> Select the Premium Service Options tab.
- Check the “Use Stealth Postage (hide postage value)” box.
- Click the “OK” button.
Rubber Stamps:
Adding Rubber Stamps to your label layouts allows Solid Commerce to automatically place information on your labels.
Use the table below to determine how DAZzle Rubber Stamps correspond to fields in Solid Commerce.
|
DAZzle Rubber Stamp |
Default Solid Commerce Field |
| Rubber Stamp 1 | Package ID |
| Rubber Stamp 2 | Marketplace Order Number |
| Rubber Stamp 3 | SKU |
| Rubber Stamp 4 | SC Sale ID |
| Rubber Stamp 5 | Storage Location |
| Rubber Stamp 6 | UPC |
| Rubber Stamp 7 | Item Title |
EXAMPLE: If you would like to include the SKU on your labels, add Rubber Stamp 3 in to your DAZzle Label Layout.
While these options cover most needs, it is possible to customize your Rubber Stamp references through a Shipping Rule. If you want to include references other than these defaults, see Adding References and Rubber Stamps to Shipping Labels.
To set up the Rubber Stamps on your DAZzle labels:
- Open any of your label layouts from the Design tab of DAZzle.
- Insert menu -> Rubber Stamp…
- Select the “Display reference field” radio button.
- Select the correct Rubber Stamp number from the drop down menu.
- You can adjust the font face and size in the dialog box.
- Click the location on your label where you want the Rubber Stamp to appear.
Printer Setup
You will need to setup your label to work with your printer.
- Open any of your label layouts from the Design tab of DAZzle.
- File menu -> Printer Setup...
- In the pop up window -> Select a Printer from the drop down menu.
- Check the Paper Feed Source to see if it is correct or if it can be changed.
- Select a Printer Paper Size from the drop down menu.
- Check the “Save printer information with layout” box.
- Click the “Test Print” button.
- If the red print area box and printed label are out of alignment, the Envelope Offset settings can be used to adjust the placement of the print.
- If the red print area box is too small and the label is getting cropped, you can try clicking on the Printer Paper Size drop down menu and double clicking on your selected label size from the drop down. Double clicking on “User Defined” from the drop down may also work.
- NOTE: Endicia’s support should be able to assist you if you have any issues printing your test label.
- Once the test label looks good ->> Click the “OK” button.
Saving DAZzle Labels
After you've finished customizing your label, and completed your printer setup, save the label layout through the File menu -> Save Layout As...
We recommend giving your custom label layouts a new name. Many people put their company name or company initials in front of DAZzle’s standard label layout name.
Now that you've created your Shipping Profile and set up your DAZzle label layouts, you're ready to start printing USPS labels through SolidShip. See the Related Articles section below for assistance installing and setting up the shipping tool.
Related Articles
- Creating Shipping Rules to Automate Your Shipping
- Installing the SolidShip Shipping Tool
- Setting Up the SolidShip Shipping Tool
Comments
Article is closed for comments.